Wi-Fi is great for dashboards, but when your phone should talk directly to a sensor — no router, no internet — Bluetooth Low Energy is the right tool. The ESP32 has BLE built in, and its most useful pattern is notify: the board pushes new values to your phone automatically the moment they change. In this tutorial you will build a BLE temperature sensor that notifies a phone app every two seconds, and learn the GATT concepts — services, characteristics, UUIDs — that every BLE device on the planet shares.
BLE in Four Ideas
BLE organizes data as a GATT server on the sensor: a service (like “Environmental Sensing”) contains characteristics (like “Temperature”), and each characteristic has properties — read, write, or notify. Your phone is the client: it scans for devices advertising a name, connects, discovers the services, and subscribes to a notifying characteristic. From then on the ESP32 calls notify() and the phone gets the new value instantly — no polling, which is exactly why BLE sensors run for months on coin cells. Services and characteristics are identified by UUIDs; standard ones are 16-bit (temperature is 0x2A6E), custom ones are 128-bit random numbers you can generate once and hard-code.
Parts Needed
- ESP32 dev board with USB cable
- 1× DHT11 or DHT22 sensor (or just use the built-in hall sensor for a parts-free demo)
- 10 kΩ pull-up resistor for bare DHT sensors
- An Android or iOS phone with the free nRF Connect app installed
Wiring the Sensor
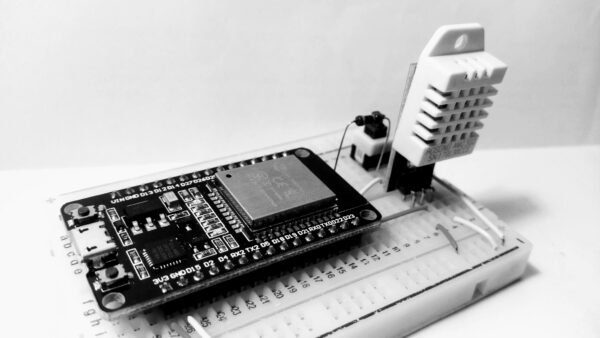
Identical to our weather station build — BLE does not change the hardware at all.
| DHT Sensor Pin | ESP32 | Notes |
|---|---|---|
| VCC | 3V3 | 3.3 V keeps the data line GPIO-safe |
| DATA | GPIO 4 | 10 kΩ pull-up to 3V3 if bare sensor |
| GND | GND | — |
The BLE Notify Sketch
Install the “DHT sensor library” by Adafruit; the BLE library ships with the ESP32 Arduino core. Upload this sketch:
#include <BLEDevice.h>
#include <BLEServer.h>
#include <DHT.h>

#define SERVICE_UUID  "4fafc201-1fb5-459e-8fcc-c5c9c331914b"
#define TEMP_CHAR_UUID "beb5483e-36e1-4688-b7f5-ea07361b26a8"

const int DHT_PIN = 4;
DHT dht(DHT_PIN, DHT22);

BLECharacteristic* tempChar = nullptr;
bool phoneConnected = false;

class ServerCB : public BLEServerCallbacks {
  void onConnect(BLEServer* s)    { phoneConnected = true; }
  void onDisconnect(BLEServer* s) { phoneConnected = false; s->startAdvertising(); }
};

void setup() {
  Serial.begin(115200);
  dht.begin();

  BLEDevice::init("DIYDAILY-Temp");
  BLEServer* server = BLEDevice::createServer();
  server->setCallbacks(new ServerCB());

  BLEService* service = server->createService(SERVICE_UUID);
  tempChar = service->createCharacteristic(
    TEMP_CHAR_UUID,
    BLECharacteristic::PROPERTY_READ | BLECharacteristic::PROPERTY_NOTIFY
  );
  service->start();
  BLEDevice::startAdvertising();
  Serial.println("Advertising as DIYDAILY-Temp");
}

void loop() {
  float t = dht.readTemperature();
  if (!isnan(t)) {
    String payload = String(t, 1);
    tempChar->setValue(payload.c_str());
    if (phoneConnected) tempChar->notify();
    Serial.println(payload);
  }
  delay(2000);
}
Walkthrough
The setup chain is always the same: init the radio with a device name, create a server, create a service, add a characteristic with PROPERTY_NOTIFY, start advertising. The callback restarts advertising when the phone disconnects — without it the board vanishes forever after the first session. In the loop we push a plain string (“23.4”) into the characteristic and notify. In nRF Connect: scan, connect to DIYDAILY-Temp, open the service, tap the three-arrow subscribe icon on the characteristic, and watch values arrive every two seconds.
Where to Go Next
Add a second characteristic for humidity, or a writeable one so the phone can set a sample interval. Replace the string payload with the standard 16-bit temperature format (hundredths of a degree) and use UUID 0x2A6E inside service 0x181A — suddenly generic fitness-style apps understand your sensor. The same notify pattern drives heart-rate straps, bike power meters and smart thermometers, so everything you practiced here transfers directly.
Designing Your Own GATT Profile
When you outgrow one value, think in profile terms: one service per logical device function, one characteristic per value or control point. A plant monitor might expose a “Plant” service with moisture (notify), battery level (read) and sample interval (read/write). Generate fresh 128-bit UUIDs for custom items — never reuse the reserved 16-bit range for non-standard meanings — and paste each UUID into your sketch as a constant with a comment saying what it is. Keep notify payloads small (under 20 bytes fits the default BLE packet); pack multiple readings into one short string or a compact byte array rather than notifying five characteristics back to back. Your phone battery and your connection stability will both thank you.
Troubleshooting
- Device not found when scanning: check the board actually booted (open Serial at 115200) and that advertising restarted after a previous connection.
- Connects, then drops instantly: weak USB power — BLE TX bursts brown out cheap cables; use a short, thick cable.
- Subscribed but no values: you forgot
PROPERTY_NOTIFYat creation, ornotify()only runs whenphoneConnectedis true. - Old value shows after reconnect: nRF Connect caches services; refresh from the app menu.
- Pairing prompts: this sketch uses open “Just Works” connections; if an app demands bonding, add security callbacks or choose “pair” and accept the default.
Safety Notes
- BLE is radio: anyone in range can read an unsecured characteristic — never put sensitive data on an open notify channel.
- Keep the antenna area of the board clear of metal; detuning the antenna wastes battery and range.
- As with Wi-Fi projects, power from a supply that can deliver 500 mA peaks cleanly.
Conclusion
You now speak the language of billions of devices: services, characteristics, notify. The complete loop — sense on the ESP32, push over BLE, display on a phone — took no router, no account and under eighty lines of code. Next, combine BLE notify with deep sleep and you have a commercial-grade wireless sensor built on your kitchen table.