Take one ESP32, add one DHT22 sensor, and you have a weather station that serves live temperature and humidity to any browser on your network — complete with an auto-refreshing dashboard and a JSON endpoint for future integrations. This project combines the sensor-reading pattern from our DHT11 Arduino tutorial with the ESP32 web server, and it is the foundation most people use before piping data to Home Assistant or a cloud dashboard later.
Why the DHT22 (and Not the DHT11)
The DHT22 (also sold as AM2302) costs a little more than the DHT11 and earns it: it measures −40 to +80 °C with ±0.5 °C accuracy and 0–100% relative humidity at ±2–5%, versus the DHT11’s narrow 0–50 °C / ±2 °C. Electrically they are nearly identical — 3.3–6 V supply, single data wire, one reading every two seconds — and the same Adafruit DHT library drives both by just changing one constant. Since the ESP32 is a 3.3 V board, we power the DHT22 from 3.3 V, which conveniently makes its data line safe for the GPIO with no level shifting.
Parts Needed
- ESP32 dev board with USB cable
- 1× DHT22 / AM2302 sensor
- 1× 10 kΩ resistor (bare sensor only; most modules include one)
- Breadboard and jumper wires
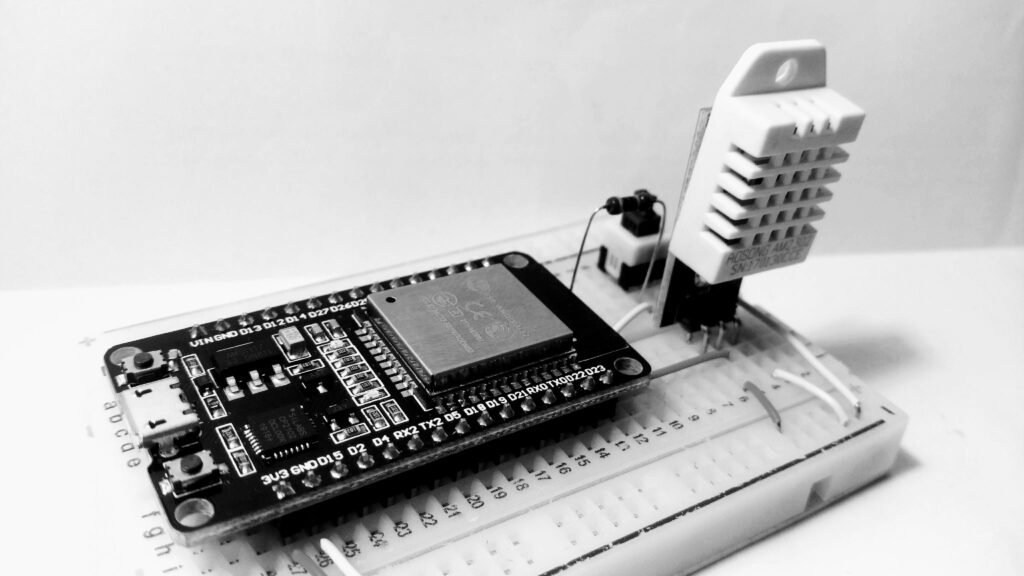
Wiring the DHT22
On the bare sensor (grille facing you, pins down), pin 1 is VCC, pin 2 is data, pin 3 is unused, pin 4 is GND.
| DHT22 Pin | ESP32 | Notes |
|---|---|---|
| VCC (pin 1) | 3V3 | 3.3 V keeps the data line GPIO-safe |
| DATA (pin 2) | GPIO 4 | 10 kΩ pull-up to 3V3 on bare sensors |
| GND (pin 4) | GND | Pin 3 left unconnected |
The Weather Station Sketch
Install the Adafruit “DHT sensor library” (with its Unified Sensor dependency) via the Library Manager, set your Wi-Fi credentials, and upload:
#include <WiFi.h>
#include <DHT.h>

const char* SSID     = "YourWiFiName";
const char* PASSWORD = "YourWiFiPassword";
const int   DHT_PIN  = 4;

DHT dht(DHT_PIN, DHT22);
WiFiServer server(80);

void setup() {
  Serial.begin(115200);
  dht.begin();
  WiFi.begin(SSID, PASSWORD);
  while (WiFi.status() != WL_CONNECTED) delay(500);
  Serial.print("Dashboard: http://");
  Serial.println(WiFi.localIP());
  server.begin();
}

void loop() {
  WiFiClient client = server.available();
  if (!client) return;

  String req = client.readStringUntil('r');
  float t = dht.readTemperature();
  float h = dht.readHumidity();
  if (isnan(t) || isnan(h)) { t = -99; h = -1; } // Flag bad reads.

  client.println("HTTP/1.1 200 OK");
  client.println("Connection: close");

  if (req.indexOf("GET /json") >= 0) {
    client.println("Content-Type: application/json");
    client.println();
    client.printf("{"temp_c":%.1f,"humidity":%.0f}n", t, h);
  } else {
    client.println("Content-Type: text/html");
    client.println();
    client.println("<meta http-equiv='refresh' content='10'>");
    client.print("<h1>Weather Station</h1><p>Temperature: ");
    client.print(t, 1);
    client.print(" C</p><p>Humidity: ");
    client.print(h, 0);
    client.println(" %</p>");
  }
  client.stop();
}
Walkthrough
Two routes share one server: / returns a page whose meta refresh tag reloads it every ten seconds — an instant dashboard — while /json returns machine-readable data for scripts and future integrations. Readings are taken per request, and failed checksums surface as obviously wrong sentinel values instead of silent zeros. Open the printed IP from any device on your network and watch your breath raise the humidity in real time.
Placement Matters
Sensor location beats sensor accuracy. Keep the DHT22 away from the ESP32’s own regulator (which adds a degree or two), out of direct sun, and away from windows and radiators. For outdoor use, shelter it from rain and condensation — a Stevenson-screen-style vented box made from stacked plastic saucers works beautifully and costs almost nothing. Elevate the sensor at least a meter above soil or decking, because ground-level air runs several degrees warmer on sunny afternoons.
Adding More Sensors Later
The architecture here scales gracefully. A BMP280 on I2C (GPIO 21/22) adds barometric pressure and a second, more accurate temperature reading; a BH1750 adds light level in lux; a rain gauge or anemometer arrives as pulse counting on an interrupt pin. Keep each sensor’s reading code in its own function returning a value or NaN, and build the JSON by appending fields — the page and endpoint then grow without restructuring. One caution from experience: cheap DHT22 clones drift upward in humidity after a year outdoors, eventually pinning at 99%. When your station reports permanent fog, bake the sensor at 70 °C for a few hours (no plastic touching the oven) or simply budget a replacement — at this price, calibration drift is a maintenance item, not a failure.
Troubleshooting
- NaN / sentinel readings: data wire on the wrong GPIO, missing pull-up on a bare sensor, or powering from 5 V with long wires — stick to 3V3 and short jumpers.
- Wi-Fi drops after a while: add a Wi-Fi reconnect check in the loop and power from a decent 5 V supply; brownouts during TX bursts are the usual cause.
- Readings 2–3 °C high: the sensor is cooking next to the board — move it 10 cm away on wires.
- Page stale: that is the 10-second refresh working as designed; DHT22 cannot deliver data faster than every 2 s anyway.
Safety Notes
- For outdoor installation, keep the USB power adapter indoors and run only low-voltage cable outside — never take mains outside for a hobby sensor.
- The DHT22 is not condensation-proof; mount it so drips cannot reach the grille.
- This station is informational; do not rely on it for freeze protection of plants or pipes without independent alarms.
Conclusion
You now have a network appliance you built yourself: sensor in, HTML and JSON out, zero cloud required. Natural next steps are logging readings to SPIFFS or a local database, adding a BMP280 for pressure, or pushing to Home Assistant via MQTT. And when you want this running for months on batteries, our deep-sleep tutorial shows exactly how to get there.